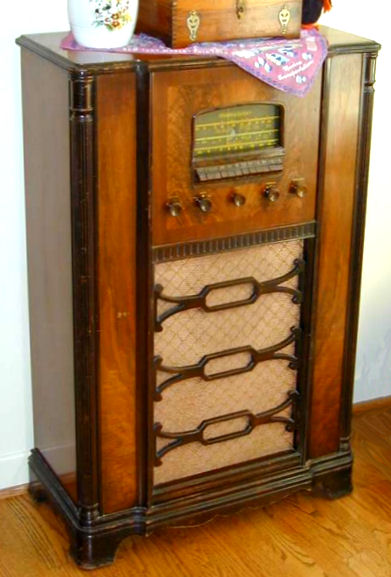
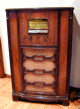
Stromberg-Carlson Model 440M Console Radio (1939)

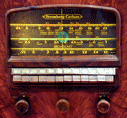

My Stromberg-Carlson 440M console radio has a classic, stately look.
Built in 1939, it has 10 tubes, motorized tuning, and the
famous "Acoustical Labyrinth" speaker system.
This radio not only performs well, but also shows outstanding build
quality and is easy to service. These are hallmarks of Stromberg-Carlson,
which began in 1894 as a telephone company and quickly established
a reputation for fine engineering and durability.
Description
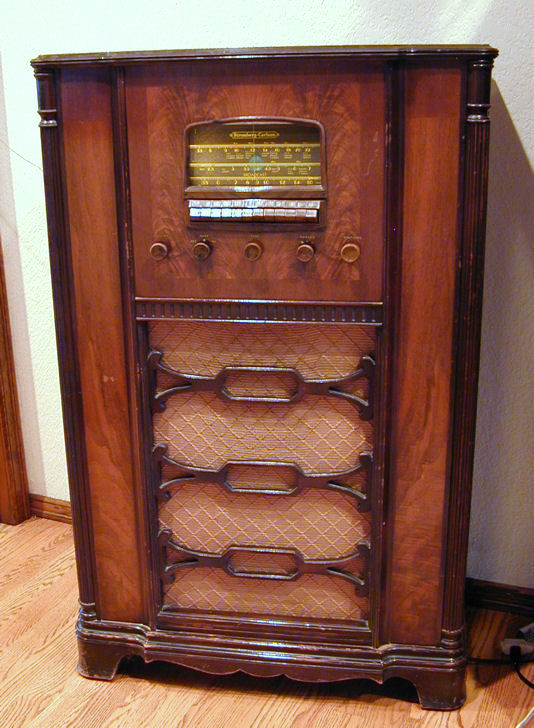
I bought this set at a second-hand shop for $165.
It was in good original condition. Notice the ornate details and front panels of
matched walnut veneer.
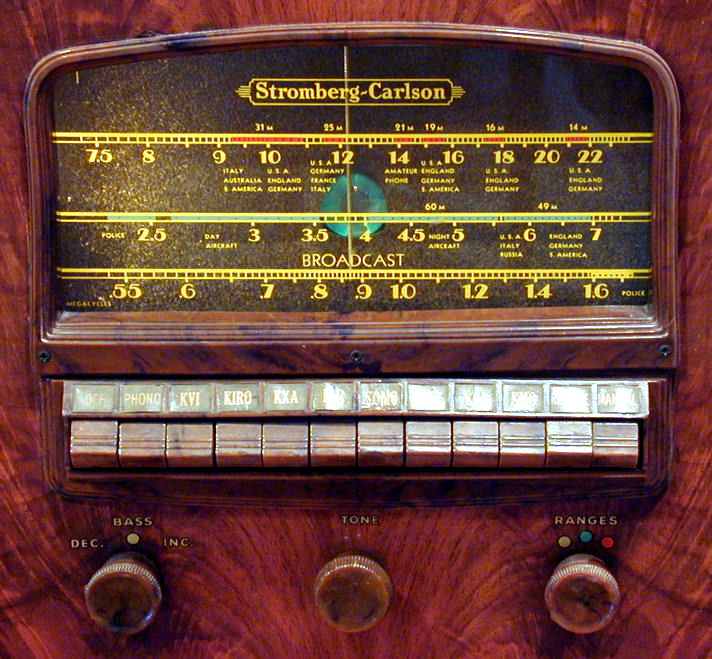
The next photos give a closer view of the dial and controls, as well
as the front veneer.
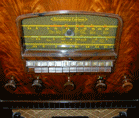
A magic tuning eye is seen in the middle of the dial, which covers three bands:
standard broadcast from 550-1650 kilohertz, and shortwave from 2.5-22.5 megahertz.
From left to right, the knobs are labeled Volume, Bass (with Decrease, middle, and Increase settings),
Tone, Range (to select one of the three bands), and Stations (the tuner).
Below the dial are ten pushbuttons, labeled Off, Phono, KVI, KIRO, KXA,
KJR, KOMO, KRSC, KOL, KMO, Remote, and Manual. The eight call numbers
are for Seattle area stations of the time. (Some, such as KOMO,
are still on the air.) You can reset the buttons to any stations that
you like, of course.
The Remote button selects the wired remote control if one is present.
The station buttons both turn on the set and make the motorized tuner select
the desired station.
The shortwave bands potentially include
hundreds of stations, so for shortwave listening you press the Manual
button and turn the tuner knob.
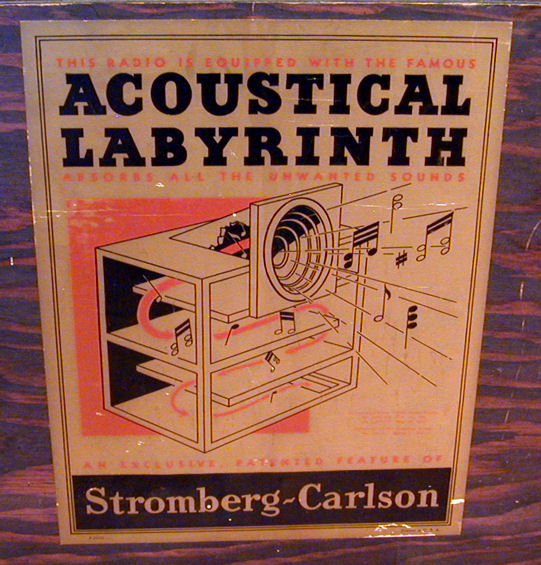
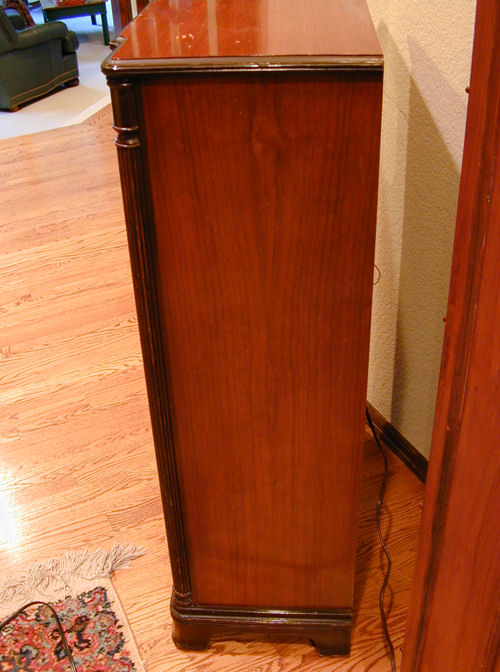
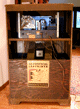
The rear view shows the chassis and the "Acoustical Labyrinth" speaker
enclosure:
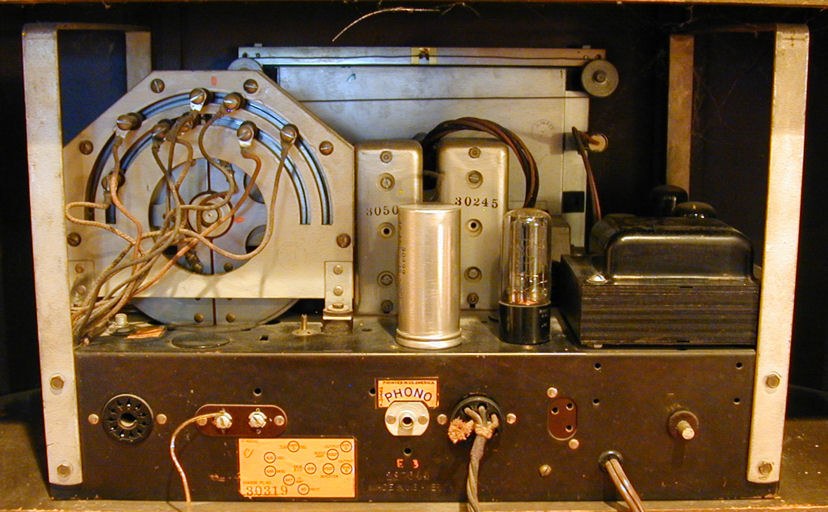
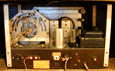
Below is a closer view of the chassis. A label shows the layout of all ten tubes.
A small panel has terminals to connect a longwire antenna and ground.
The large round jack at the chassis's lower left is for
a wired remote control. This remote was optional and I
have never seen one in the flesh. If you have a photo of one,
send me an email.
The beefy power transformer at the chassis's right is appropriate for
a high-tubecount set like this, and emblematic of Stromberg-Carlson designs,
which tend to err on the side of durability.
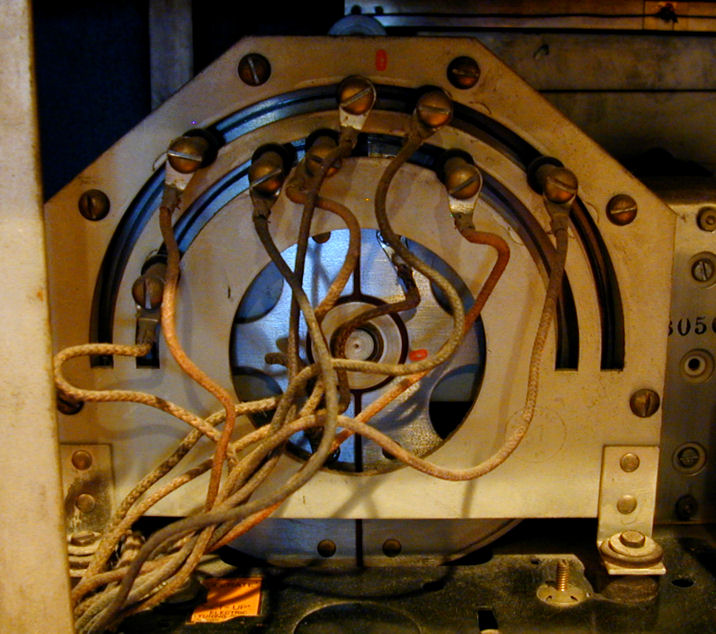
The round mechanism at upper left of the chassis is the motorized tuner,
controlled via the preset pushbuttons. This photo shows the motorized
tuner in closeup.

The dial's eight preset tuning buttons correspond to the eight
adjustable leads seen in the curved slots of the tuner mechanism.
It's fun to see the motorized tuner work once in a while, but for
everyday listening, I use the manual tuner knob to avoid wear and
tear on this 70+ year old gizmo.
Two service manuals are available for the 440M radio. The
Rider's
manual has instructions for setting the tuner to desired stations, as well
as a schematic diagram and other service information. Years after I first published this
article, a visitor to this website sent me a copy of the Stromberg-Carlson factory
manual, which has a little more info:

Here is a list of the 440M's ten tubes and their functions.
|
Tube |
Type |
Function |
|
V1 |
6A8 |
Modulator |
|
V2 |
6J5 |
Oscillator |
|
V3 |
6K7 |
IF Amplifier |
|
V4 |
6H6 |
Demodulator/AVC |
|
V5 |
6SQ7 |
Audio Amplifier |
|
V6 |
6SQ7 |
Audio Inverter |
|
V7 |
6V6 |
Audio Output |
|
V8 |
6V6 |
Audio Output |
|
V9 |
6AF6G |
Magic Eye |
|
V10 |
80 |
Power Rectifier |
The 6AF6G magic eye is my favorite tuning indicator tube.
Most magic eyes are a circle with a single pie shape
that opens or closes according to a station's signal
strength. The 6AF6G has two opposing segments, which
can be wired so that they respond differently to various
signals, resulting in an eye with a sort of
coarse-fine function. You can read more about such
indicators in my magic eye article.
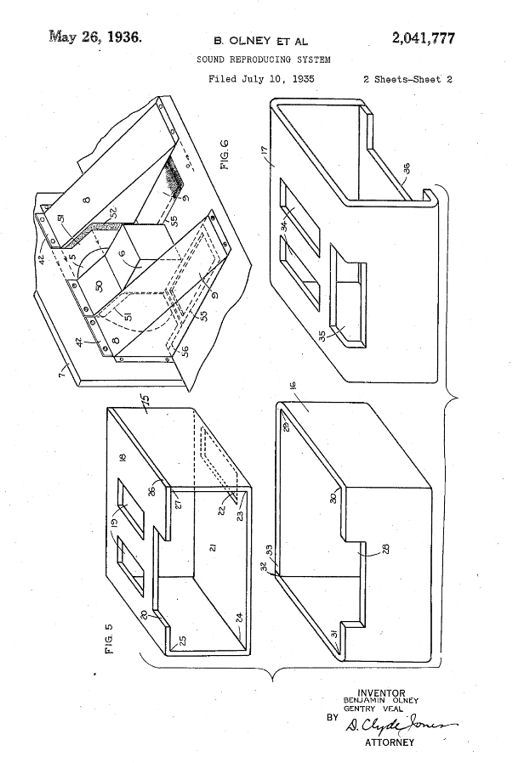
The Stromberg-Carlson Acoustical Labyrinth
The bottom third of the cabinet is occupied by the
Acoustical Labyrinth, a baffled enclosure that improves
the audio quality. The rear of the speaker frame protrudes from
the top of the enclosure, and the label in back gives a simplified
view of how it works.
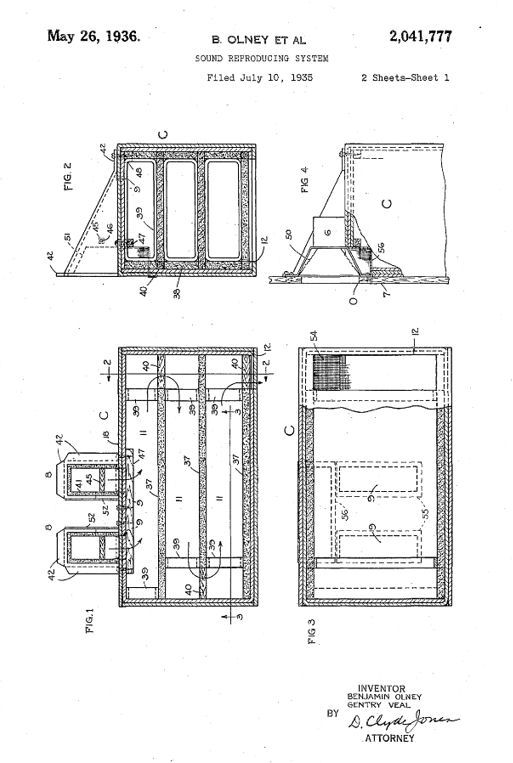
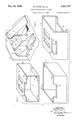
Stromberg-Carlson patented this system in 1939. Here are two
of the patent drawings.
If you're interested in audio technology, you may find the complete patent
description interesting:
US Patent 2,014,777.
The following brief article explains the labyrinth more in layman's terms.
In a nutshell, it's designed to prevent cavity resonance and standing
high-frequency standing waves, and improve bass response.

I'm no audiophile, but the 440M certainly sounds good to me. It has nice
fidelity and enough volume to shake the rafters. The dual tone controls give
you a lot of flexibility to adjust the tone for different sorts of music,
as well.
Electronic Restoration
Restoring the electronics was straightforward. Nothing was required
beyond routine capacitor replacement and
cleaning and lubricating the tuner and controls.
A welcome feature is the sturdy "roll cage" built onto
the top of the chassis. This lets you turn the chassis on its side
or even upside down on the workbench, without damaging delicate components.
If only every radio had a service frame like that!
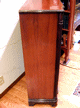
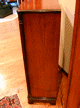
Cosmetics
The cabinet has various scuffs and scrapes, typical of any 72-year old
piece of furniture. Stripping it would be overkill.
If I do anything at all, I'll lightly touch up the boo-boos, preserving
as much original character as possible.
Final Thoughts
This radio sounds great and its restrained yet interesting styling is exactly to my
taste. It has sat in the front entry area of our home for over 10 years.
|