General Electric Model F-63 Radio (1937)


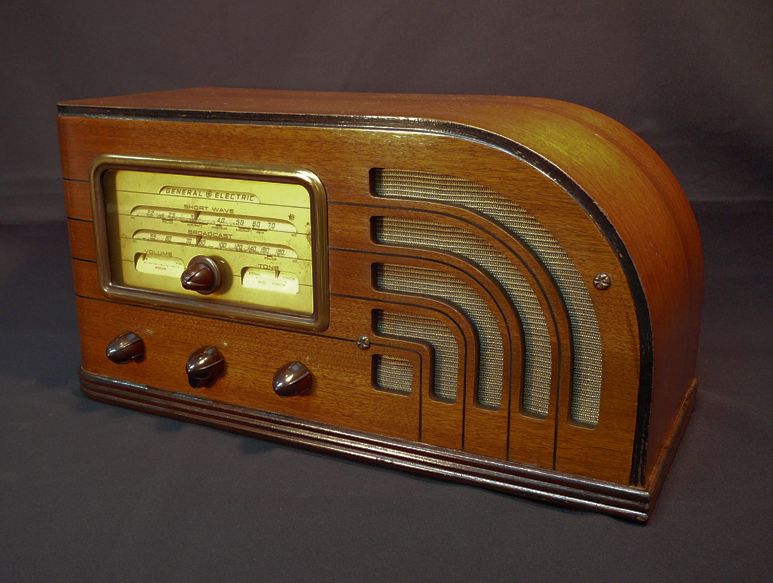
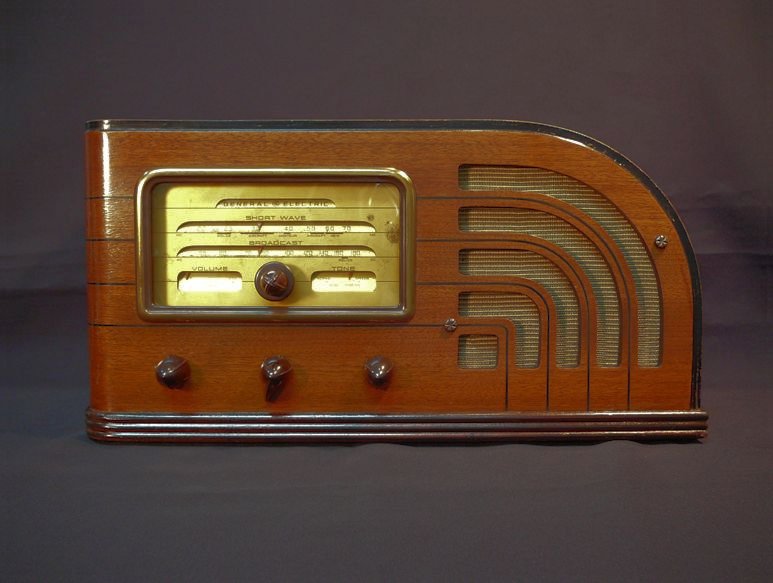
This 1937 Model F-63 radio from General Electric has a bold, streamlined cabinet, the epitome of
Art Deco style. The waterfall profile of the right side is echoed in the speaker grille and subtle
pinstripes extend from the grille and past the dial, wrapping around the cabinet's edge.
This is a medium size tabletop radio, about seventeen inches wide.
Here are some views of the restored set.


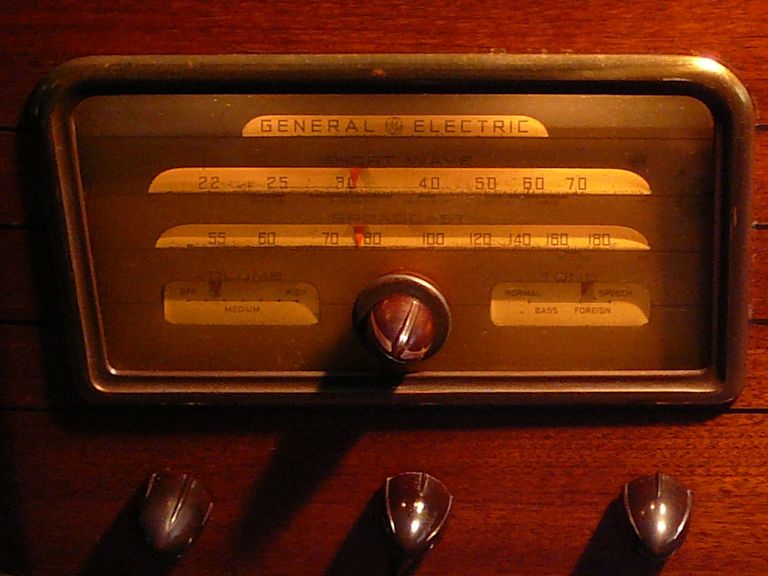
The GE F-63 is a two-band AM radio, receiving the standard broadcast band and one shortwave
band (2.2-7.0 MHz). It follows a conventional 1930s superheterodyne design, employing tubes
of types 80, 6K7, 6H6, 6F5 and 41. You can find the Riders
service manual at Nostalgia Air.
Like many 1930s radios, this one requires a long wire antenna, which you attach to a lead
coming out of the back of the chassis.
This set has a four-position tone control, whose settings are shown in the lower
right of the dial (Normal, Bass, Foreign, and Speech). The pointer to the left of the central tuning knob is
something you won't see often: a visual indicator for the volume control.

I think the volume indicator was included for visual symmetry, to balance
the tone indicator at the right of the tuning knob. Most people don't need visual aids to
adjust the volume—they simply listen to the radio!
Finding a GE F-63
I purchased this radio in 2010 from the original family, who lived about twenty miles away.
This photo shows the cabinet before restoration:
The radio was complete and unabused, in pretty good shape, overall. The biggest defect was flaking lacquer
around the bottom trim, but that is easy to remedy.
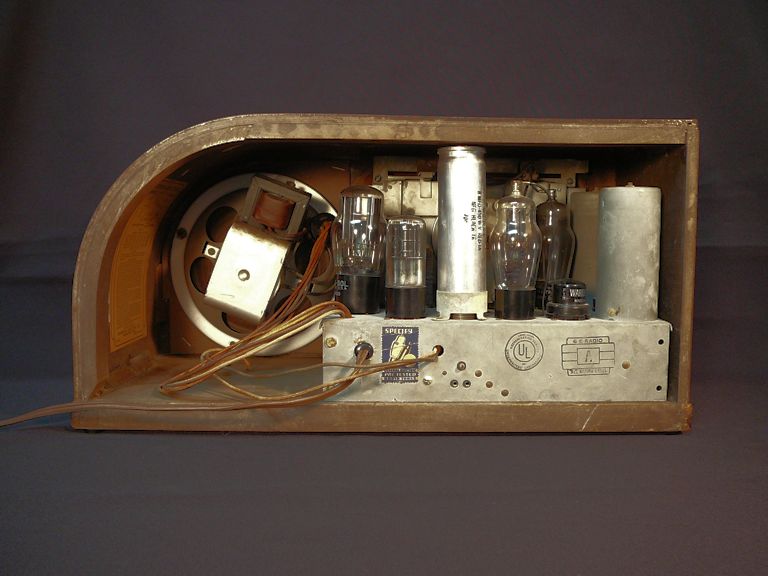
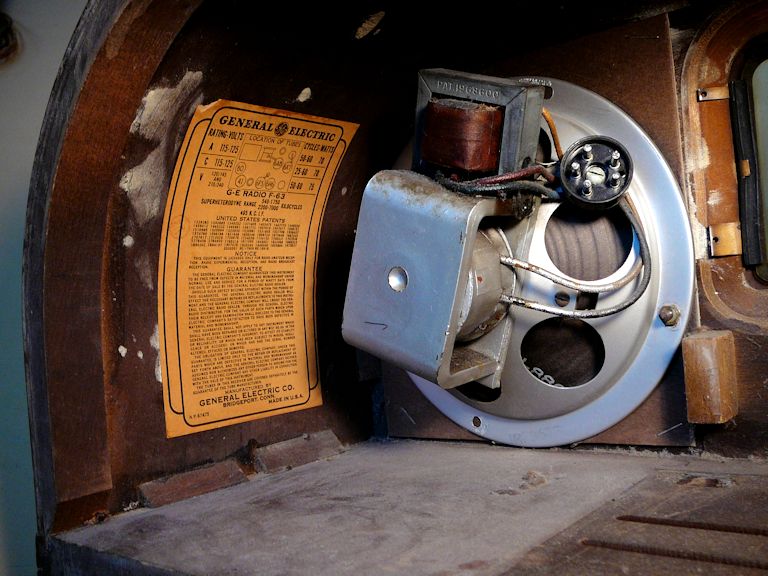
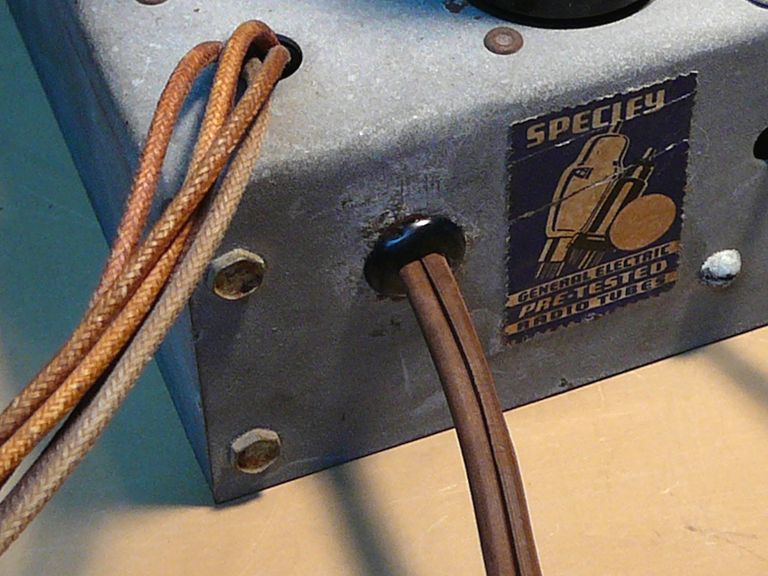
Inside the cabinet you can see the identifying label and the electrodynamic speaker,
which attaches to the chassis with a cable and five-pin plug.

The cabinet interior had some dust, but nothing that a quick wipe couldn't cure.
I usually clean cabinet interiors with isopropyl alcohol or mineral spirits (paint thinner), which
cut through household grime and help to eliminate any musty odor.
Electronic Restoration
Restoring the electronics was a straightforward matter. I began by cleaning the chassis
and doing other routine tasks which you can read about in
First Steps In Restoration.
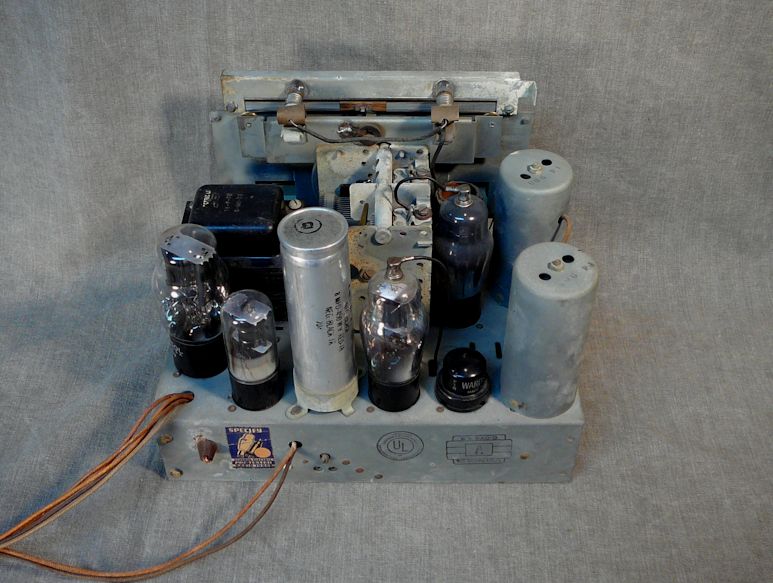
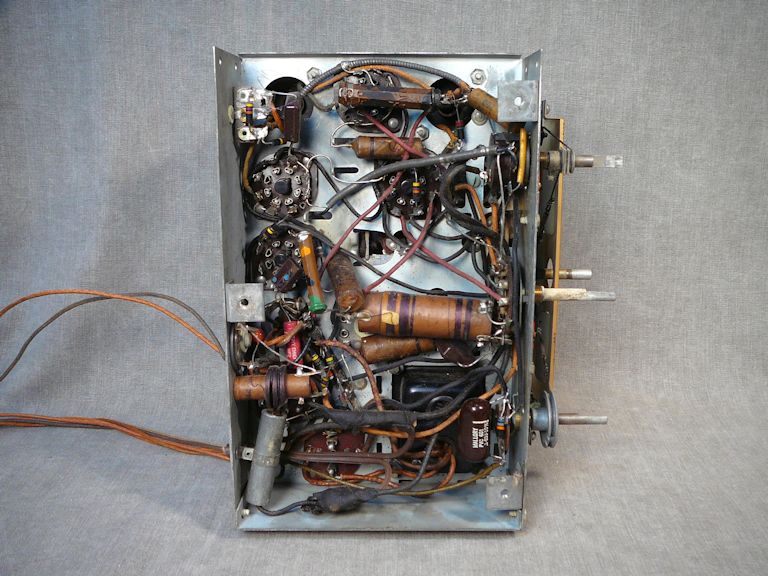
Here are some photos of the chassis before restoration:


This radio had been serviced a couple of times in the past. Under the chassis, I found a pink
Big Chief capacitor, typical of the 1950s or 1960s, and two much newer dipped mylar capacitors.
The newer mylar caps are probably still fine, but
the Big Chief will need to go, along with any remaining wax paper capacitors.
As noted in my article about replacing capacitors,
tubular caps like the Big Chief are merely paper caps in a plastic shell.
It made sense to use them in the 1960s, when nothing better was available, but
nowadays they should be replaced without hesitation.
The owner said the radio had worked until the power cord broke. "Broke" was an understatement;
as you can see in the first photo, the cord was hanging by a few strands of bare wire, which would present
a serious short-circuit risk if you tried to play the radio.
The second photo shows how I replaced it, installing a vinyl grommet to prevent chafing
against the chassis opening.


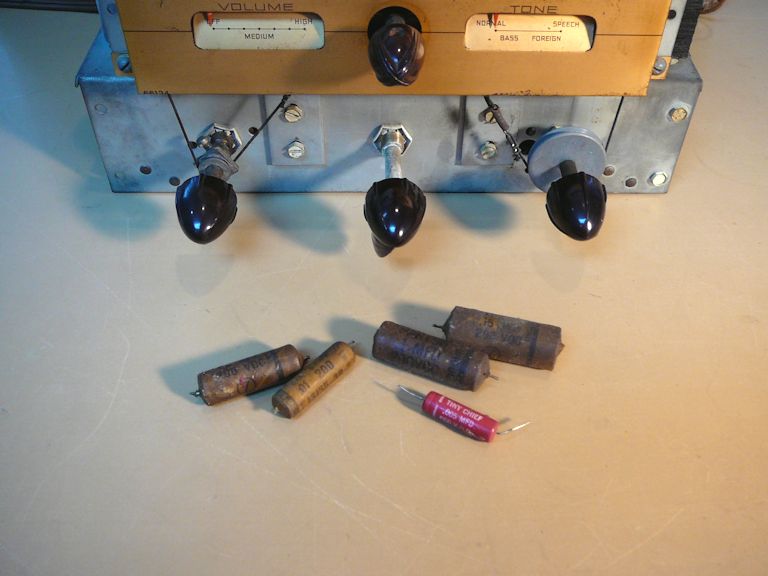
Recapping this radio was easy. The next photo shows the remaining paper caps and the pink
Big Chief left behind by a previous repairman.

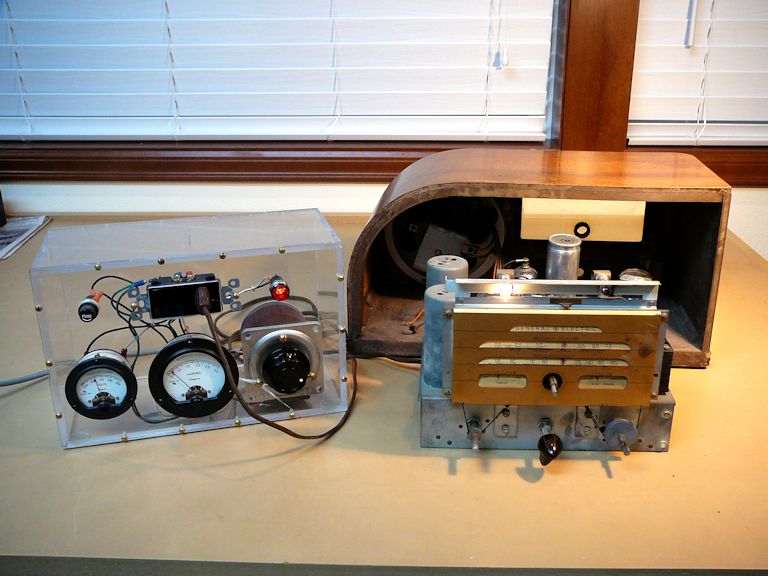
Here's a shot of the radio during its first power-up test. (This radio uses two
pilot lamps above the dial, but only one was working at this time.)

You can power this radio on the workbench by backing the chassis up to the cabinet
and plugging in the speaker cable. The speaker must be connected because its field
coil acts as a choke to help filter the radio's power supply; if it isn't plugged in, the radio
won't power up at all.
The device on the left is a variac, which I used to meter the radio's power consumption
while slowly bringing up the line voltage. That's a simple way to watch for problems such as
an undetected short circuit.
The F-63 passed its test with flying colors, receiving many stations across the dial and producing good audio.
In many radios I replace the electrolytic capacitors in the power supply,
but in this case I didn't. The radio played normally, without a trace of background hum,
and the capacitor case didn't warm up at all during an extended bench test, indicating
that the old electrolytics are behaving themselves.
Cabinet Restoration
The worst problem with the cabinet, as noted earlier, was flaking lacquer around the
dark bottom trim piece. For some reason the dark lacquer was all coming off, although the
finish on the main cabinet body still adhered well.
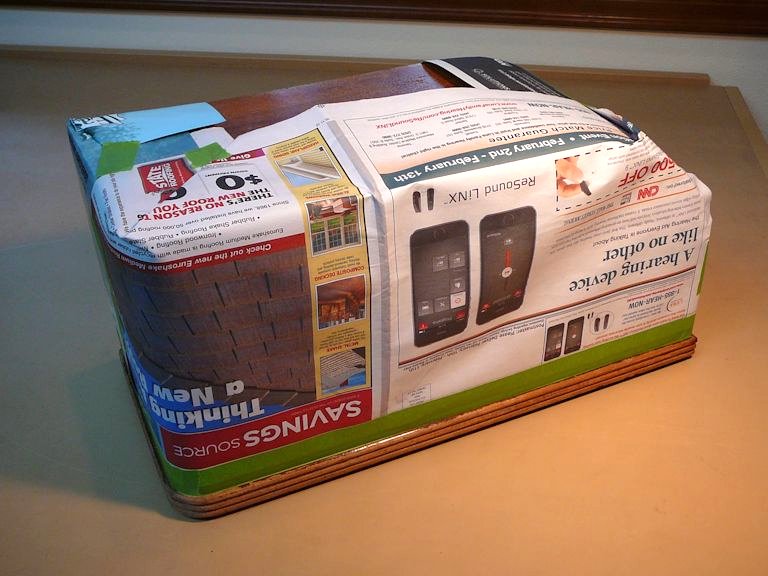
I found that I could remove nearly all of the loose trim finish by scraping with a fingernail.
After removing the old stuff, I taped newspaper over the rest of the cabinet to prepare for refinishing.
The underlying trim wood looked bare, so I sprayed on two thin coats of shellac to seal it. This will
help the lacquer adhere and prevent the wood's pores from being visible in the lacquer surface.
After the shellac dried, I sprayed on thin coats of brown toning lacquer (Mohawk Van Dyke Brown) until
I achieved the desired color. I followed that up with two coats of clear satin lacquer for
protection.
In case you are wondering, the original color scheme for this radio calls for a dark brown (not black)
trim around the bottom. Black is used in the trim strip around the front top edge of the cabinet and the matching
pinstripes.
The finish on the cabinet body was intact, but weathered and dry looking. I applied a coat of
Howard's Restor-a-Finish (Medium Walnut) and quickly rubbed it out, as stated in the directions. I don't use Howard's
for serious refinishing work, but it's adequate for a cabinet like this, which only needs a little
freshening. After that application, the minute checks and scuffs on the surface were darkened and
blended into the background, without significantly darkening the overall color.
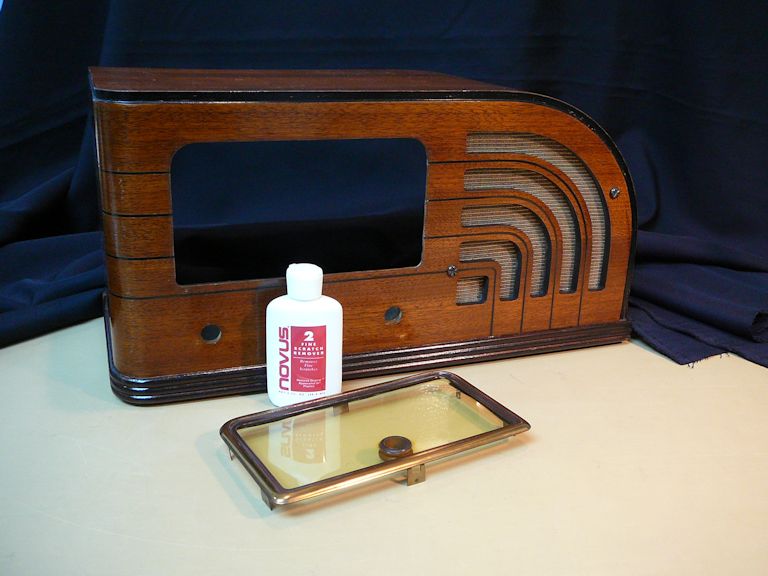
The dial cover was in good shape but it had some light scuffing, which I polished out with Novus Plastic Polish #2
and a soft cloth.
The dial cover can be removed, complete with its surrounding brass trim, by gently bending out some tabs from
inside the cabinet.
The last photo shows the completed project.
The final effect is just what I wanted. My F-63 looks like a well-cared for seventy-eight year old radio:
very attractive but still bearing some signs of use, as you would expect with any object this old. I
prefer this to the "over-refinished" look you might get by completely stripping the cabinet
and replacing its finish. With severely damaged finishes you have no alternative, but I would never
strip and re-do a cabinet like this, which looked so good in the first place.
|