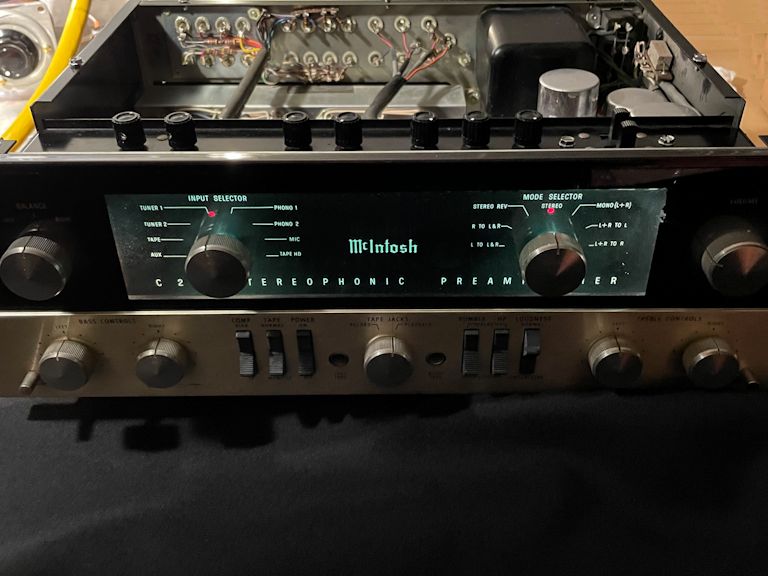
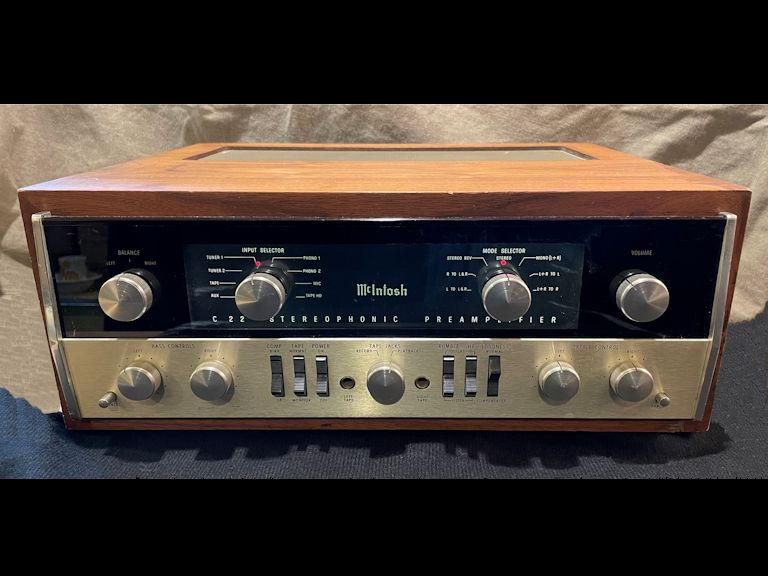
McIntosh Model C22 Preamplifier (1967)


The McIntosh Model C22 stereo preamplifier is a classic audio device from
the glory days of tube-powered hi-fi.
I got this one in 2021, with a companion
McIntosh MC240 power amplifier.
I restored both of them and now they operate in the workshop next to
my radio-TV display room.
Who Needs a Preamplifier?
In early hi-fi systems, it was typical to use a preamplifier teamed with a
separate power amplifier. For instance, my 1957
Heathkit W-6M is simply a power
amplifier, and it relies on my Heathkit WA-P2 preamp to
provide an initial stage of amplification.
In the following photo, the W-6M power amp is on the right:

Preamps usually provide control functions (volume, tone, etc.) in addition to
amplification. To quote the owner manual, the McIntosh C22 acts as a
"control center for a complete stereo system," doing four jobs:
- Switching between audio sources (radio tuner, phonograph, tape deck, etc.).
- Amplifying the low-level audio signal from the chosen source.
- Customizing the sound using tone controls.
- Compensating for equalization used in different types of recordings.
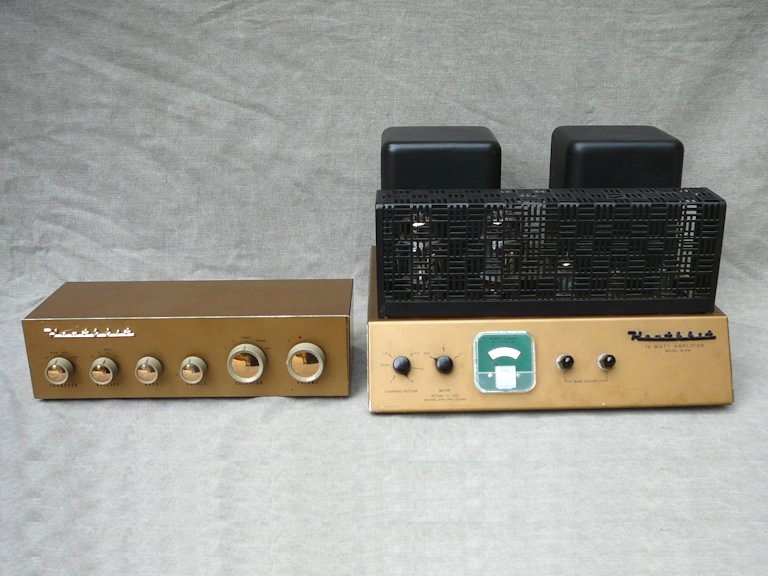
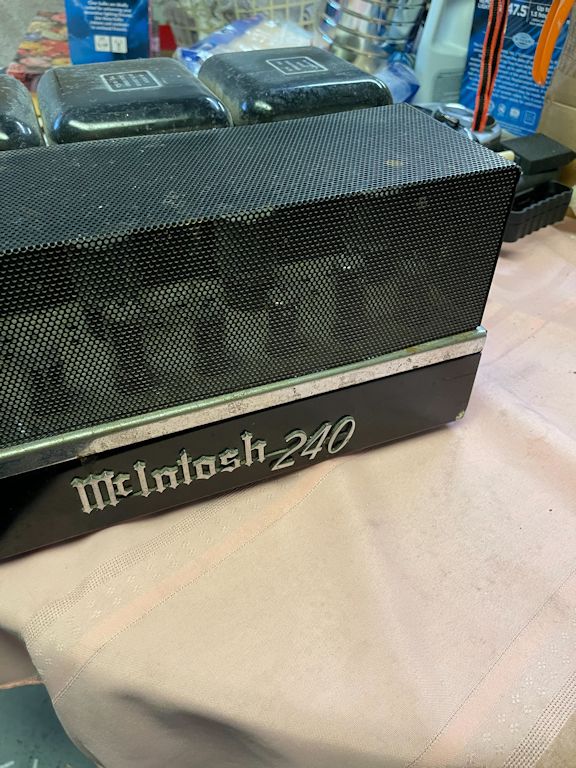
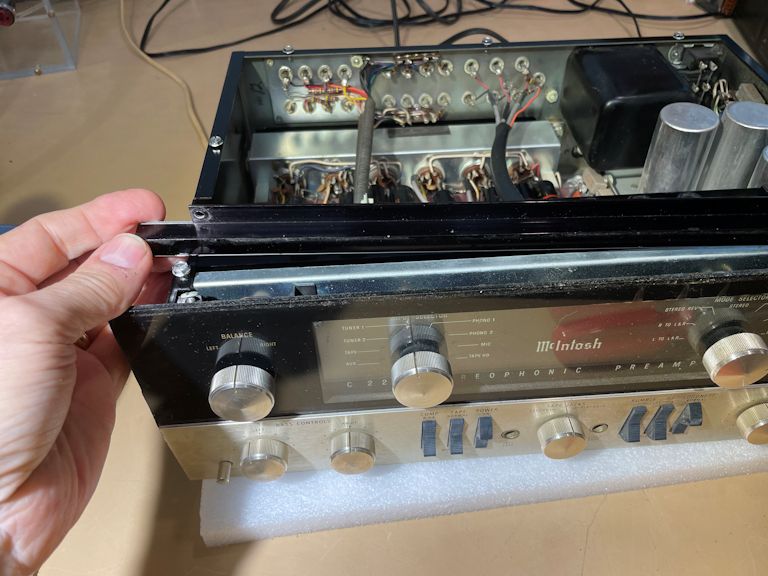
My C22 preamp is used with my
McIntosh MC240 power amp.
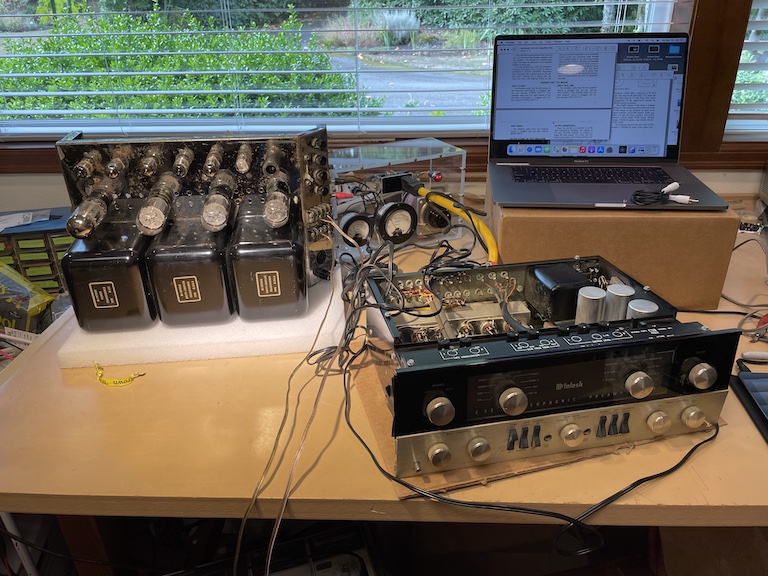
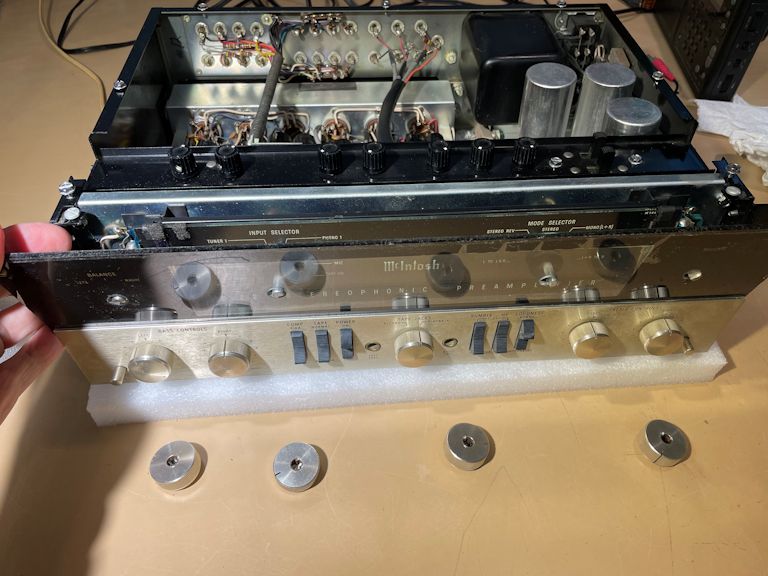
Here are both pieces on my workbench, very early in the
restoration phase (the C22 is on the right):
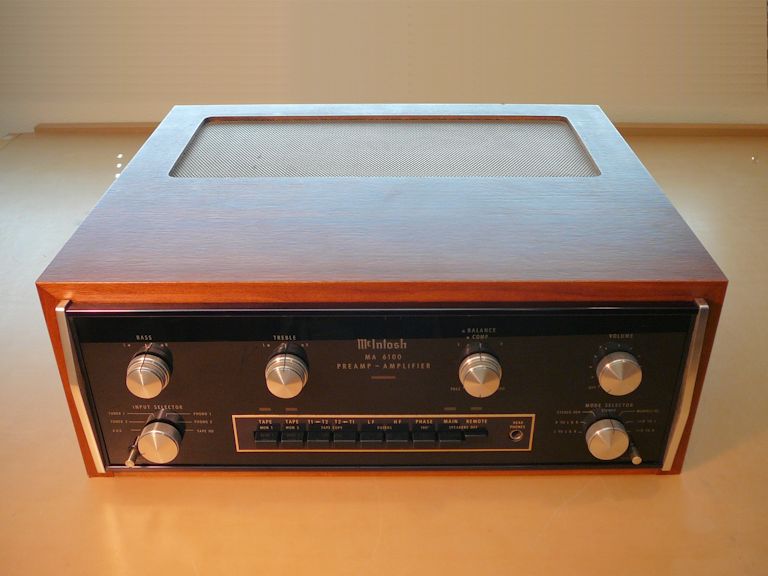
The time for separate amps and preamps was limited. Before long, manufacturers
combined the two devices on one chassis, creating an integrated
amplifier like my McIntosh
MA6100.
Yet another consolidation was to add an AM/FM radio tuner to the integrated amp,
creating a feature-rich receiver like my Fisher 800-B.
Description
The McIntosh C22 owner manual gives detailed operating instructions and
technical data:
Here is the McIntosh C22 factory service manual:
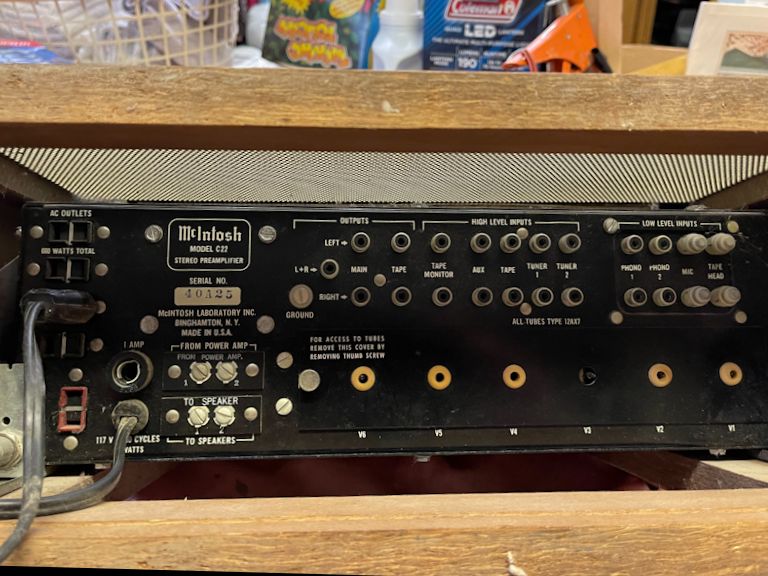
According to the
McIntosh Compendium,
McIntosh sold the C22 preamp from 1963-1972, with serial numbers from 10A01 to 73A71. My unit has
serial number 40A25, which dates it around 1966-1967.
Finding the C22 Preamp
In September, 2021, I got an email from a fellow in Illinois who inherited
his father's old radio/TV repair shop, including many vintage items. I gave him
general advice about disposing of such a collection, and mentioned that I
might be interested in old McIntosh tube gear, if he had any.
He replied with photos of this model C22 preamplifier, along with a
(legendary!) MC240 stereo power amp.


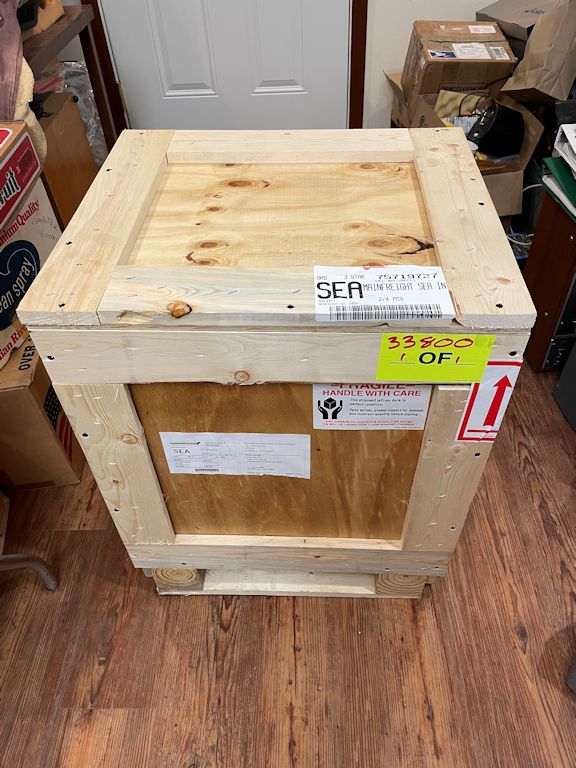
I made a deal for the pair of items and hired the
Craters & Freighters
shipping company to pick them up, build a custom crate, and ship them
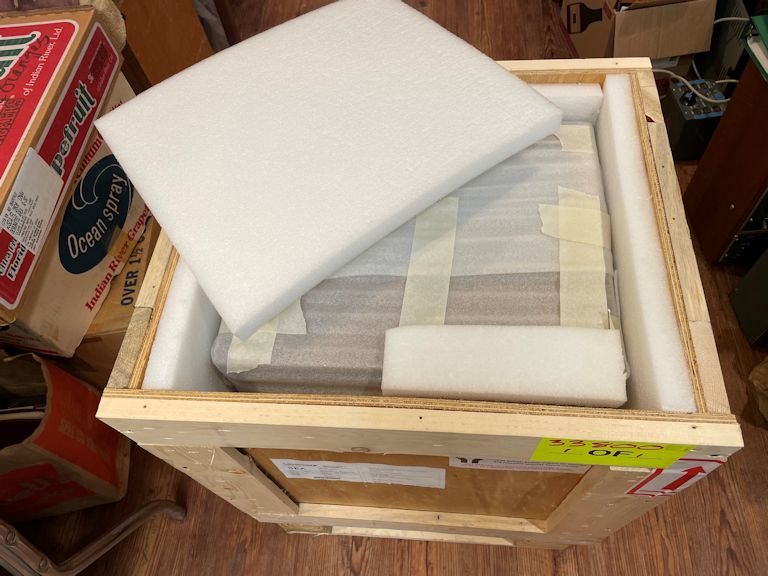
from Illinois to my home in Washington state. The crate arrived within
days, with my new C22 packed on top:

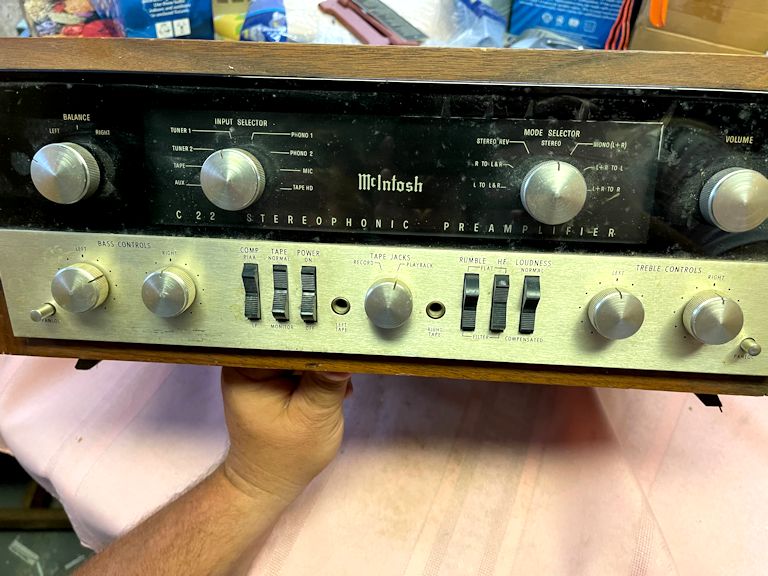
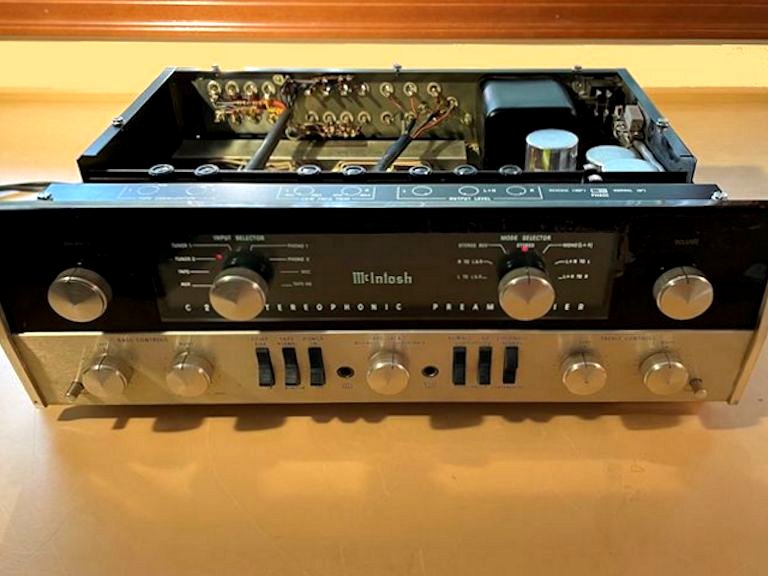
First Look
Here's my C22 preamplifier after unpacking. Apart from light dust, it's clean.


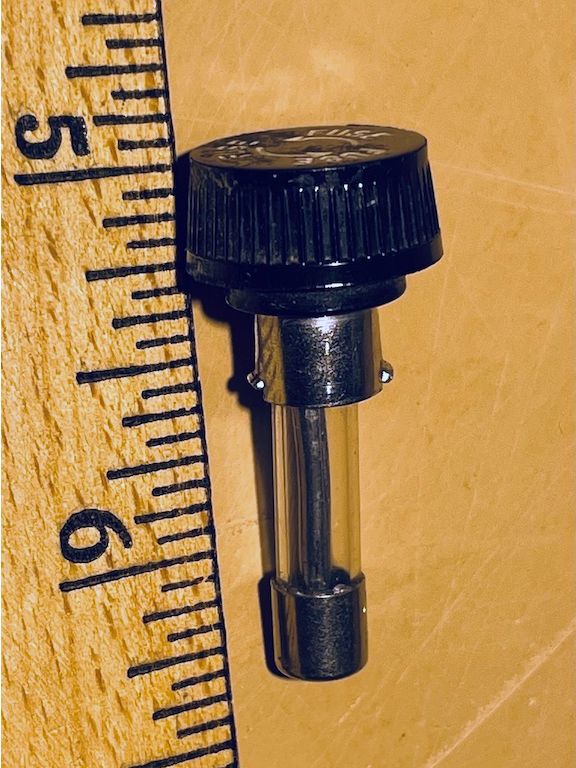
The seller's photos showed that my C22 was missing the cap for its 1-ampere
line fuse. This style of cap isn't easy to find
these days, so I borrowed one from my Scott 800B
receiver, while waiting for a replacement to be mailed.
I begin every restoration with the same basic steps—testing the tubes, cleaning
all the tube pins and sockets, and cleaning all controls such as the volume potentiometer.
(For more details, see my article, First Steps
in Restoration.)
All the tubes turned in strong results on my tube tester, so I didn't waste
money replacing them. Contrary to old wive's tales, there is no mystical advantage
in replacing strong used tubes with strong new ones.
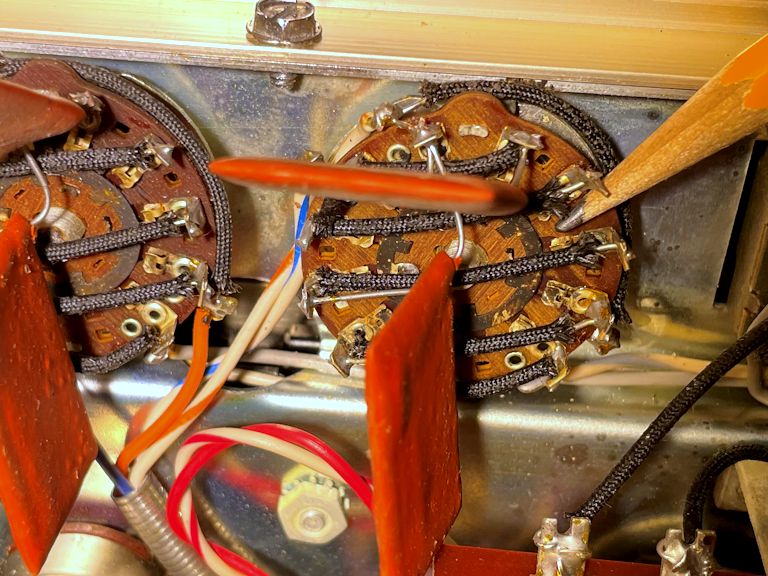
Our eyeballs tell us that the C22's controls need cleaning. Look at
the dark, oxidized elements in these Bass Control switches:

The oxidation looked bad, but it was simple to remove with DeOxit electronic
cleaner and some gentle brushing with a fiberglass pen.
After the cleanup and visual inspection, I gave the preamp a brief trial under power,
with its companion MC240 power amp. Both units were plugged into my metered
variac, which let me gradually increase the line
voltage while watching an ammeter to make sure nobody was drawing an
excessive amount of current (which might signal a short circuit). In this
view, the MC240 is resting on its side at the left, and the C22
sits at the right:
To my delight, both units powered up without incident, and together they
sounded fabulous! I won't play these unrestored tube devices
for any length of time, of course. A marginal electrolytic capacitor in the power
supply might croak at any minute—possibly frying an expensive power transformer
or wreaking other havoc.
Whenever you plan to replace several parts at once, it's helpful to have a basic performance
baseline for your device. Then, you can briefly turn on the device after every
replacement or two. If it suddenly misbehaves, you'll know it's time to check your work!
Besides using my ears during this quick test, I measured key voltages
around the preamp, which also looked reassuringly normal.
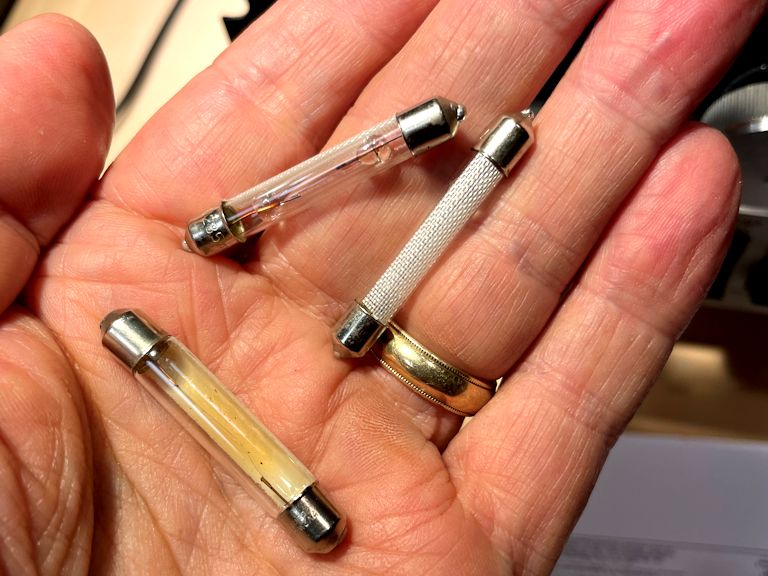
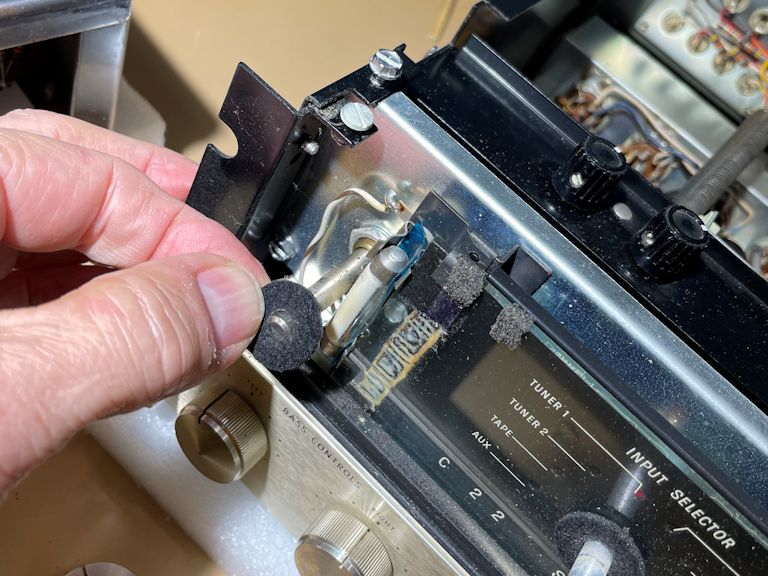
Replacing the C22's Dial Lamps
My C22's main dial lamps were burned out, so I ordered a pair of replacements.
They are easy to install after you remove the front dial glass.


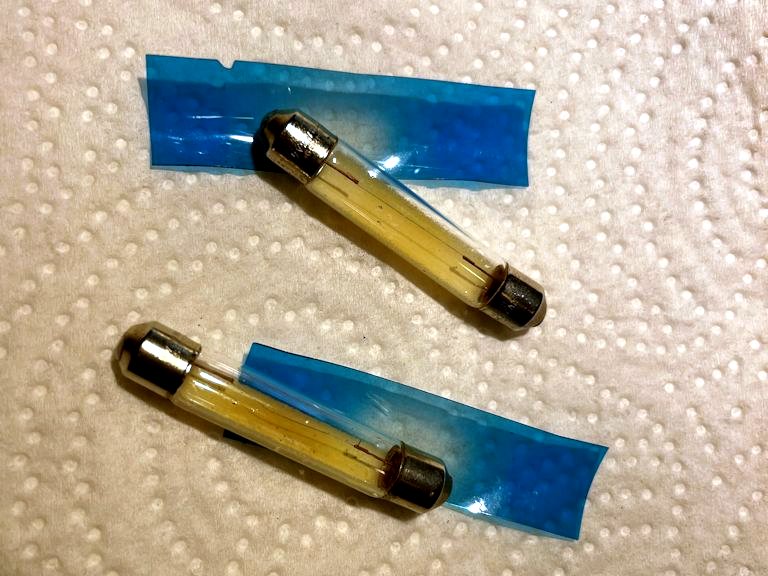
These "festoon" type lamps are about the size and shape of a fuse.
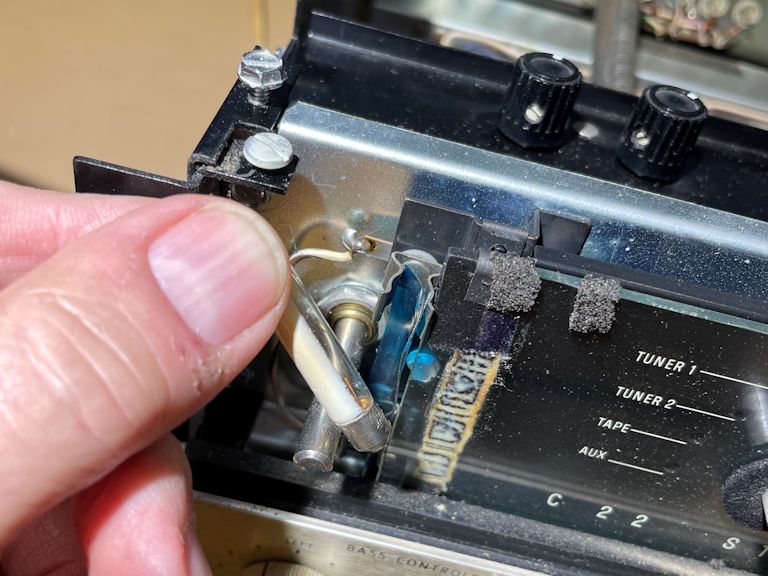
The replacements
use LEDs and snap right in. Little blue plastic strips
are slid into one side of the lamp holders to make a blue light. Don't forget
to reinstall the blue strips when you replace the lamps.


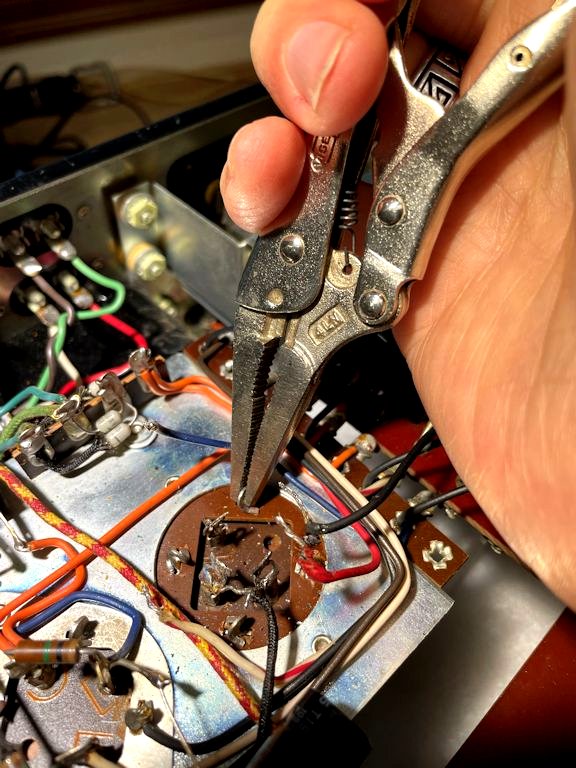
The C22 uses a pair of tiny peanut-style bulbs to illuminate the red dots
used as indicators for the Input Selector and Mode Selector knobs. Using
a needlenose pliers, you can replace these without removing the front dial glass.


Now the dial is correctly lit, red dots and all!

Restoring the McIntosh C22 Power Supply
If you do nothing else in a C22 restoration, do yourself a favor and
restore the power supply to make your preamp safe and reliable to play.
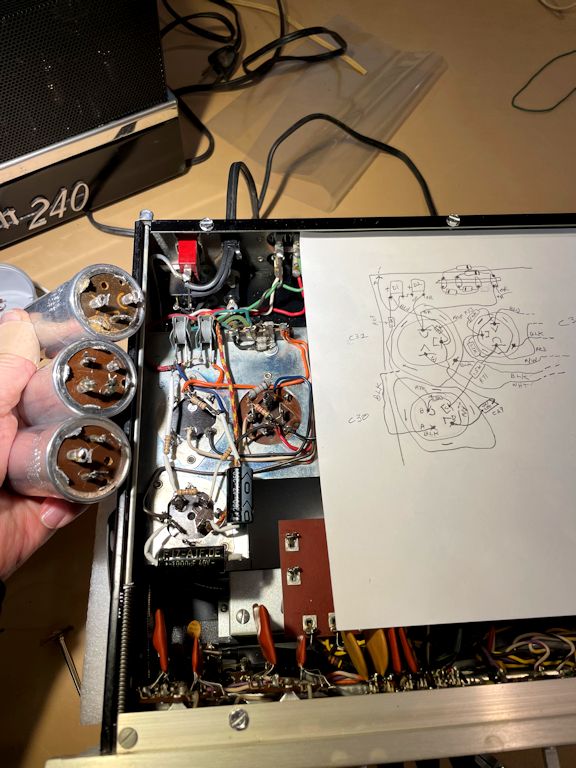
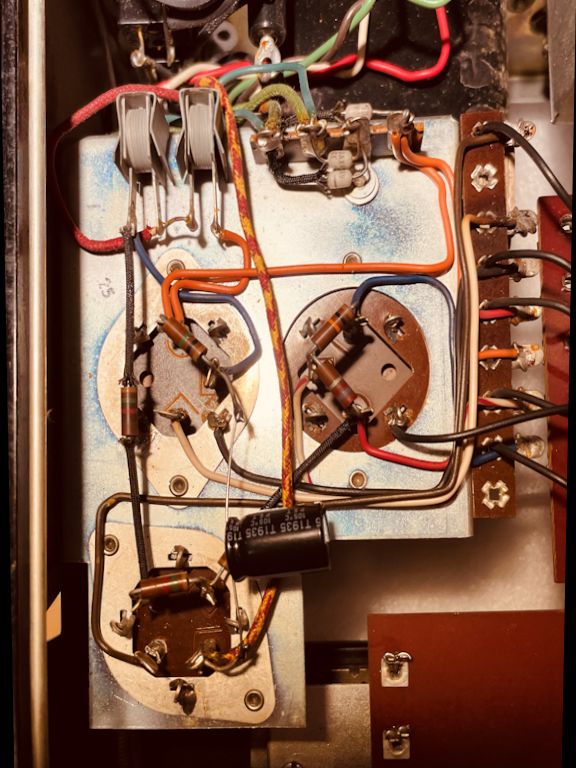
The power supply is contained on a small sub-chassis. Here is my
unrestored power chassis:
You can remove the sub-chassis to restore it, but there's no practical reason
to do so, since its components are easily accessible in situ.
As in my McIntosh MC240 restoration,
I bought a CTech Electronics
upgrade kit containing the parts needed to redo the power supply and signal path circuits.
Here is the kit and my sketch of the unrestored power supply board.
The upgrade kit also includes installation instructions, a schematic, and other
technical material.
When you replace several parts en masse, it's prudent to check off each
part as it's replaced, using the schematic and parts list for reference. To make
assurance doubly sure, I also draw little diagrams of areas like this, where there's
a lot going on. You can read more about recapping techniques in
my article, Replacing Capacitors in Old Radios and TVs.
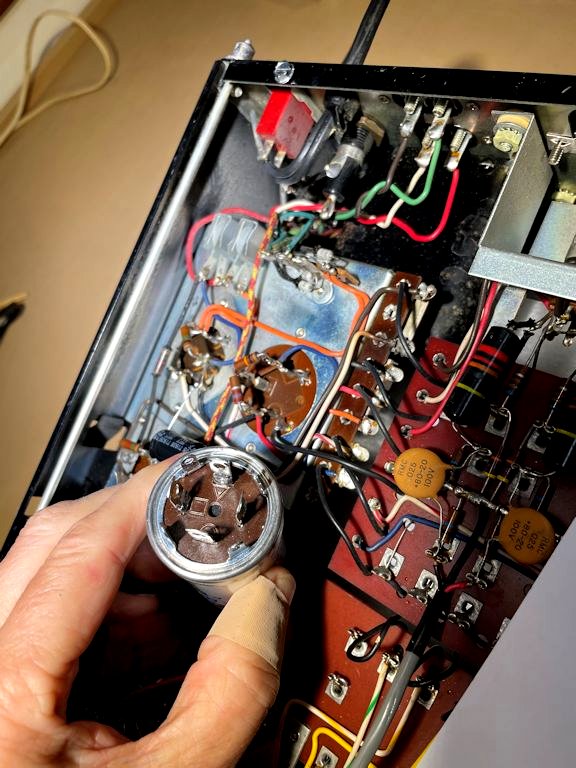
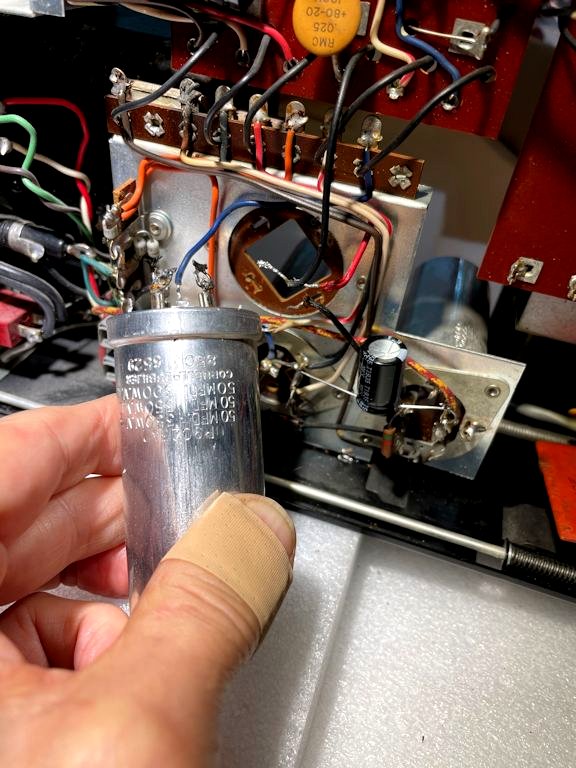
The kit includes three new can electrolytic capacitors, which are
direct replacements for the old cans. After you unsolder the connected components,
you can twist the old can's mounting tabs until they break, letting you withdraw
the old can and mount the new one in its place.
You can read a more detailed
description
of replacing electrolytic cans in my MC240 restoration article.
Yes, Selenium Rectifiers Can Fail!
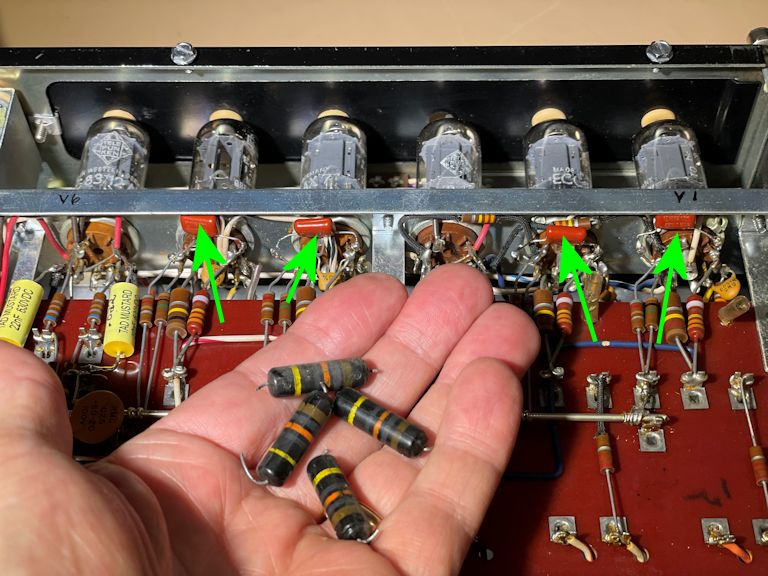
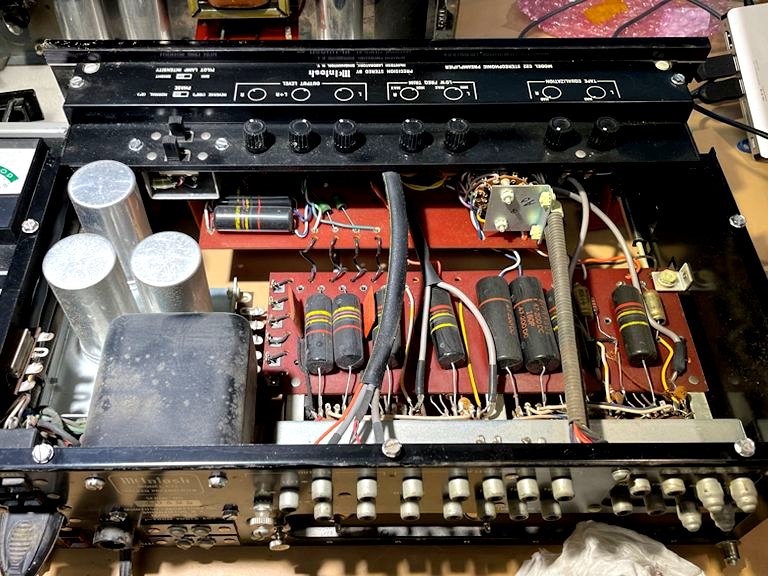
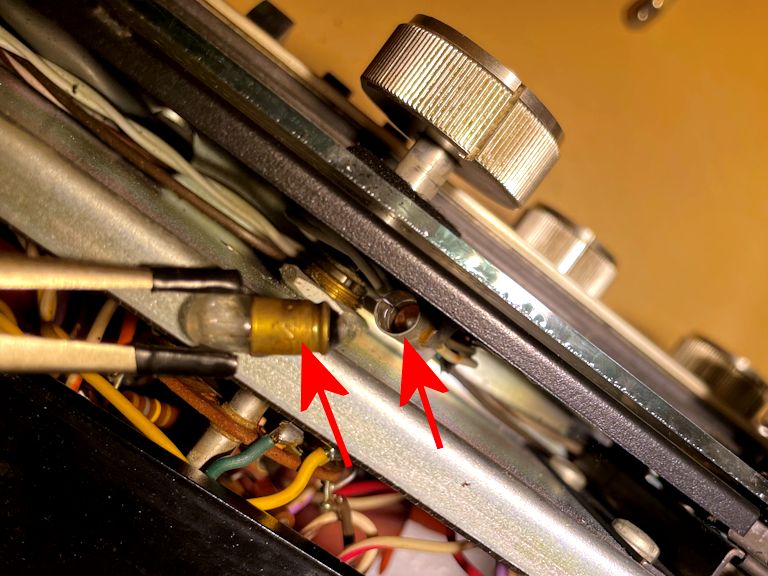
In the next photo, I'm nearly done with the power supply upgrade. I have replaced
all three electrolytic cans, two smaller capacitors, and all the resistors
on the p-s chassis. All that's left is to replace the two small gray selenium
rectifiers at the upper left corner.
Before replacing those two, I turned on the preamp for a quick sanity test.
I do this routinely when replacing components, to make sure that replacements
work as expected. The system sounded fabulous for minute or two,
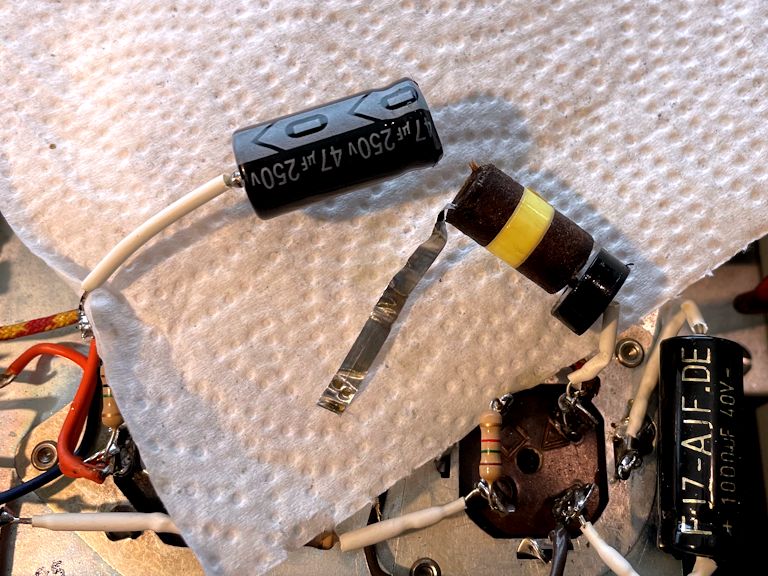
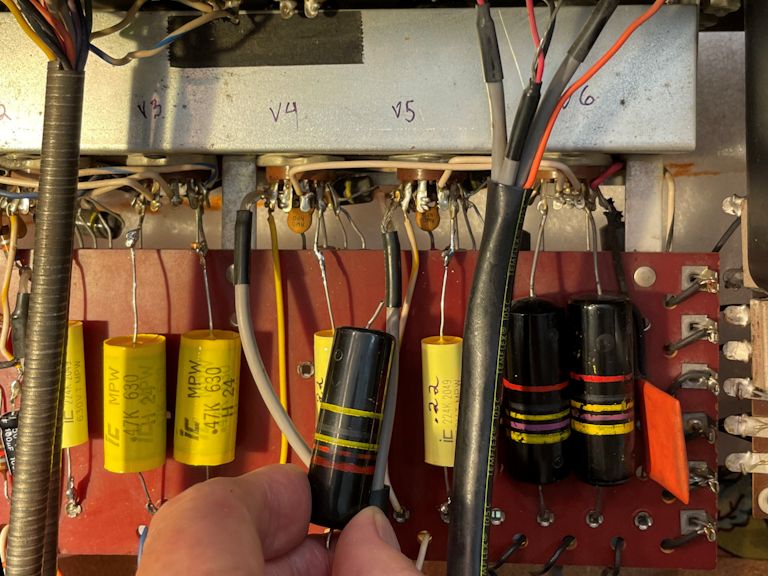
until—Bang! A loud snap was heard and the C22 went silent.
The bang sound issued from this electrolytic capacitor, which blew into separate
pieces; the inner black-and-yellow portion shot completely out of its metal case:

I had installed this new capacitor less than a hour before. While it's possible
for a new part to be defective, that's certainly not common. Could something else
have made the cap blow?
A quick inspection identified the culprit. This selenium rectifier on the power
chassis suffered a literal meltdown! Notice the blobs of melted metal
that emerged from cracks between the rectifier plates:
Selenium rectifiers are failure-prone and they sometimes emit a vile odor
when they punk out. The element selenium is also poisonous to humans, although there
is no danger in simply handling old rectifiers, whose selenium is
held inside in a stable form (absent meltdowns).
I normally replace all seleniums as a safety/reliability precaution,
just like paper and electrolytic capacitors,
and my upgrade kit included new silicon diodes for that purpose.
I simply hadn't reached that step yet, and in a masterpiece of irony,
this rectifier chose that very moment to fail!
Trivia note: Speaking of selenium, did you know that selenium
rectifiers—and Phil's Old Radios website—played a key role in the
1999 movie, "Lethal Vows," starring John Ritter and Marg Helgenberger?
Click this icon to learn more:

Back to the main feature, let's finish the power supply.
Here, I have freed the two old rectifiers and mounted
a new three-terminal strip in the same spot:
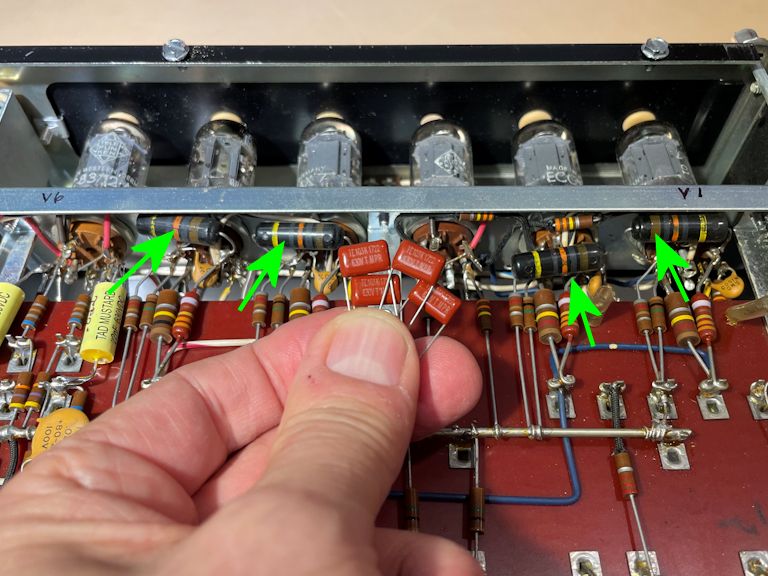
The next photo shows two diodes wired onto the new terminal strip, along with a
new zener diode to keep the B+ voltage in check. The diodes are tiny black cylinders with
white stripes on the ends.
I also replaced the blown electrolytic cap, of course. When I tested the C22's
voltages at key spots, everything checked out fine.
The power supply upgrade is complete!
Signal Path Upgrade
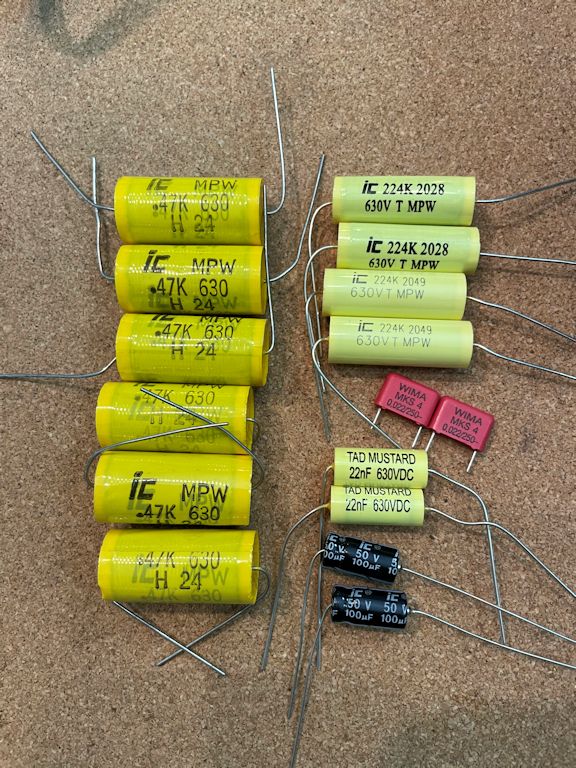
Our next task is to replace the capacitors in the preamp's signal path.
Replacement caps are included in the CTech deluxe upgrade kit:
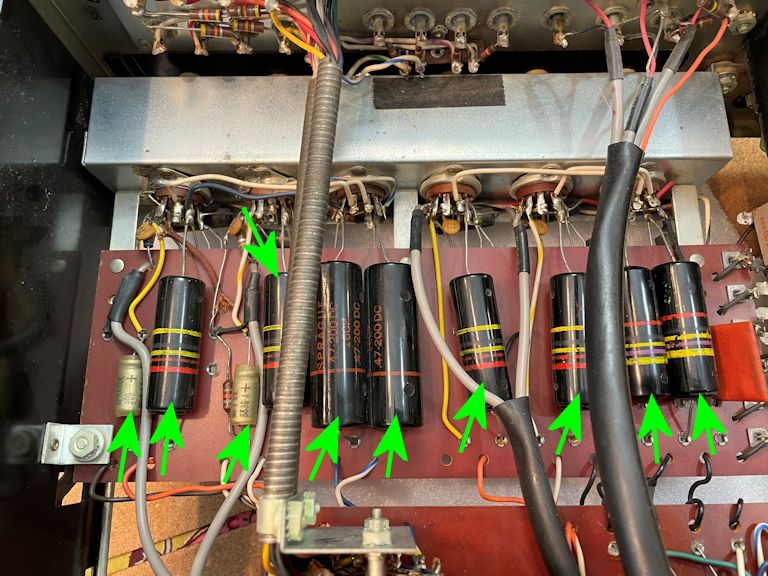
The next pics show original caps in place. Nearly all of them are the notorious
striped "bumblebees", which are unreliable paper capacitors in
plastic shells. (For more about capacitor types, see my
recapping article.)

Out with the bad, in with the good! One by one, we replace the rotten old
bumblebees with modern film caps. My little diagrams document most of the
subs.


We're done! Here are the old parts, including the new
electrolytic that blew its top when the selenium rectifier failed.
I gave the preamp a nice long bench test, checking voltages again to confirm
that everything was running within spec. Teamed with the MC240 power amp, the
C22 preamp sounded fabulous, so I declared the electronic restoration complete.
Cosmetics
My C22 was in decent cosmetic condition, so I haven't spent a lot of time
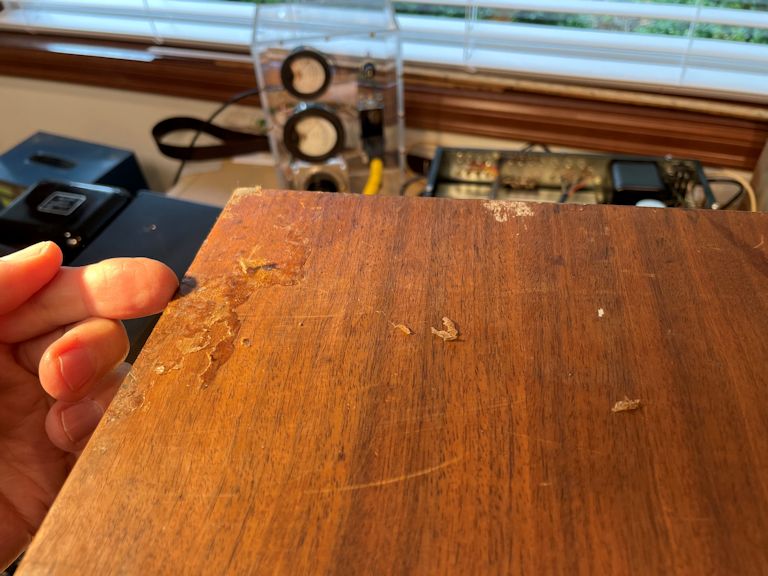
making it prettier. The cabinet is fine, except in a corner where someone blobbed
on an unknown waxy substance, perhaps in a failed refinishing experiment or
melted-wax mishap. The mystery stuff was soft enough to remove with a fingernail
and the underlying finish was pretty good, so I removed the gunk and decided to leave
the rest alone for now.

If you happen to find a C22 with a ruined cabinet, or no cabinet at all, reproduction
cabinets are readily available.
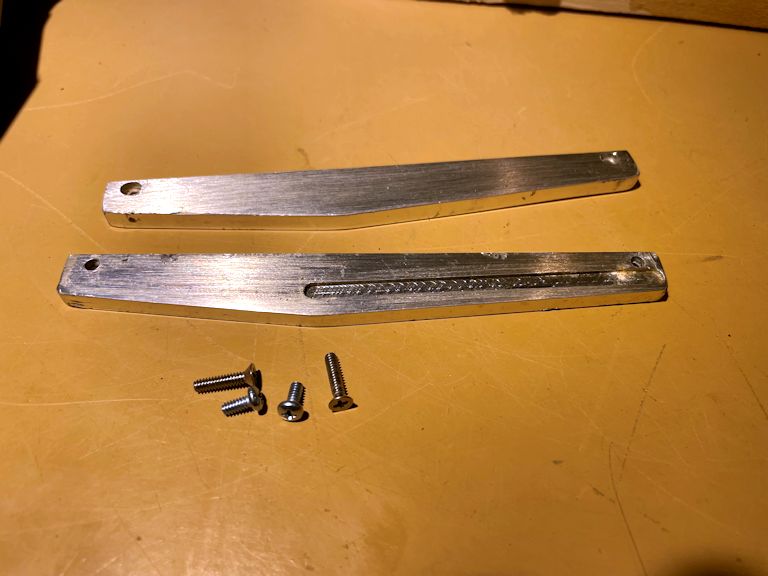
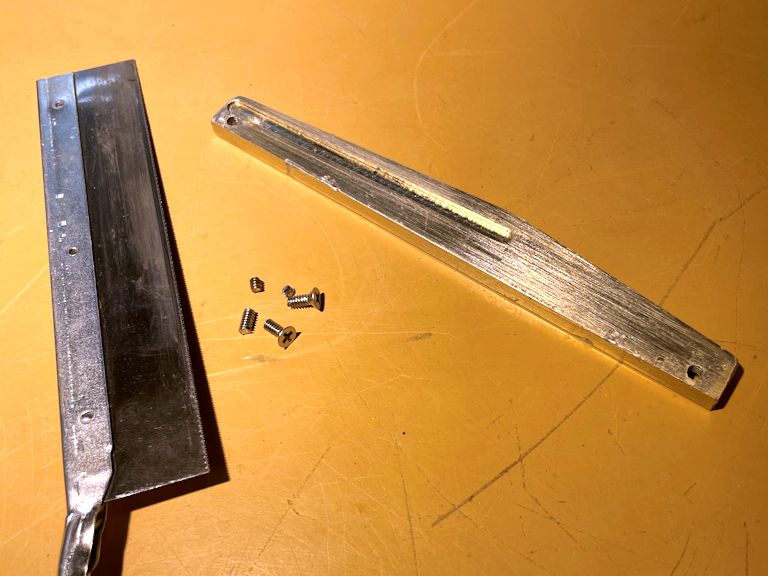
My C22 was missing the two metal end caps for the front panel. These are made of
milled aluminum, secured with four little screws. I bought replacement caps from a guy
on eBay. I couldn't find exactly the right size screws at local stores, so I bought
longer screws and shortened them.


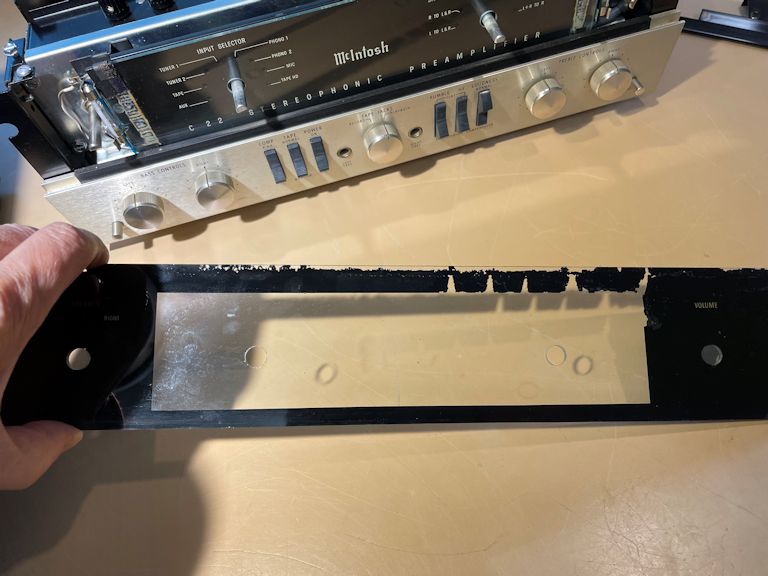
The C22 has two dial glasses, one mounted in front of the other. The rear glass has most
of the lettering and the front one basically frames the rear display. As in many
old silk-screened glasses, the black paint forming the frame suffered some flaking:

The front glass has lettering of its own, near the ends of the control area, so you can't
easily mask off the whole black area and respray it. Hand painting isn't easy, either,
not to mention (as painters know) that there are various shades of "black"
to choose from.
You can buy a new reproduction glass for something under $300. If you want perfection,
go ahead and buy one! I might do that someday, but I decided to try a simpler repair
and live with the C22 for a while, to see if I really care (or even notice it).
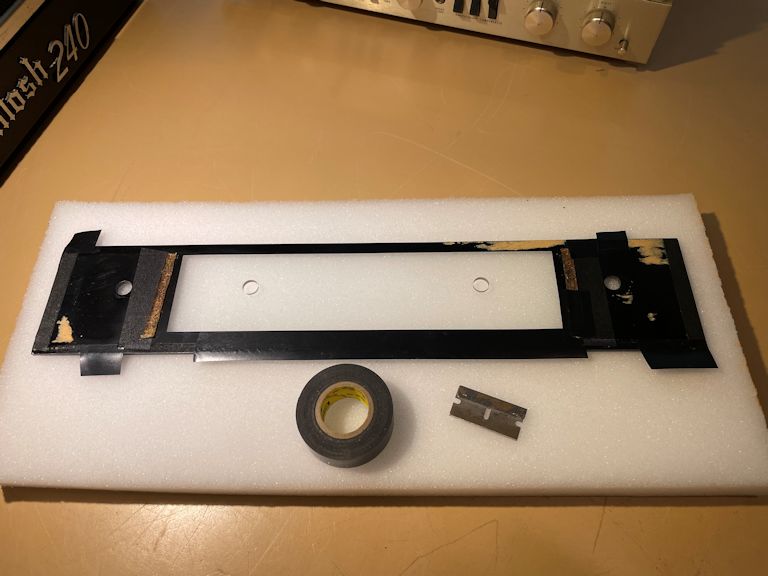
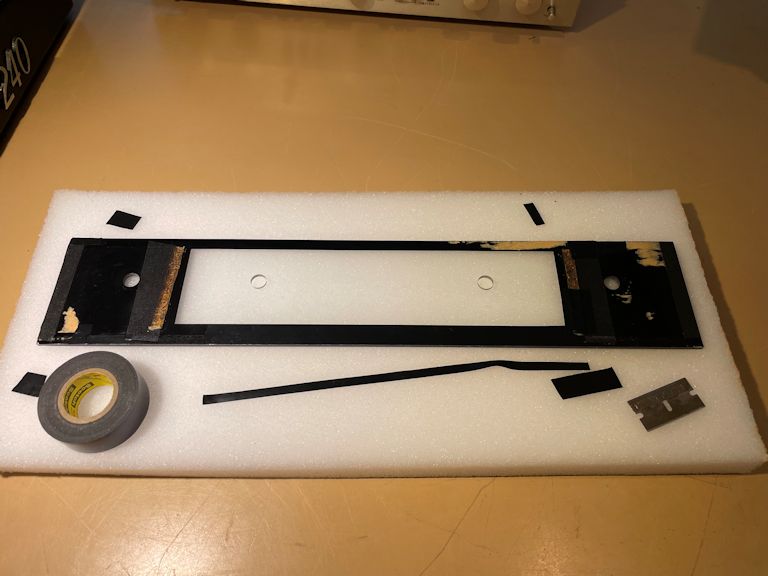
After brushing off loose paint flakes, I laid strips of black
electrical tape behind the glass, covering the damaged areas and forming
a nice (straight!) black border:


That sounds crude, but it worked surprisingly well.
If you push your nose up to the dial glass, you can see that some
paint repairs were made, but my C22 easily passes the six-foot
walk-by test:

Final Thoughts
This project was straightforward and enjoyable from beginning to end. It
helps to start with a solid, working device, of course; and
it was convenient to use an upgrade kit, although you can certainly
order your own components, if you prefer.
The exploding cap sounded ominous in the moment, but there was no mystery
about the cause and damage was trivial. If I had replaced power supply
parts in a different order, I might have replaced that selenium rectifier
before it got a chance to fail.
After restoring my C22 preamp and MC240 amp, I put the new Mac system in my main
workshop, where I play it every day of the week—with great pleasure!
I own a third piece of mid-1960s McIntosh gear—a model
MR71 FM tuner—that would make
an ideal, period-correct companion for these two, but it's being
used in another room with my
MA6100 integrated amp
at the moment.


|